Getting started with NRC7292 STANDALONE mode
Introduction
The NRC7292 based products come with STANDALONE mode beside HOST mode. The STANDALONE mode can be running with HOST OS and is suitable for IoT related scenarios.
The workflow usually comes with stages below:
- stage 1: Getting a STANDALONE mode image (To build one or use a prebuilt image)
- stage 2: Reflash the device with a STANDALONE mode image
- stage 3: Launch the device with STANDALONE mode
Getting a STANDALONE mode image
Use prebuilt image
If you are new to STANDALONE mode and want to try prebuilt images before jumping into compiling codes. There are some prebuilt images in the NEWRACOM's official SDK repository:
- https://github.com/newracom/nrc7292_sdk/tree/master/package/standalone/atcmd_binary
- https://github.com/newracom/nrc7292_sdk/tree/master/package/standalone/tools/external_tools/firmware
Warning
Skip the nrc7292_boot.bin and nrc7292_boot_xip.bin images which are for the bootloader.
If you want to develope your own STANDALONE image, please reference the sections below:
Build STANDALONE mode image in Raspberry Pi
Reference the document of AHPI7292S to setup the OS environment:
https://docs.alfa.com.tw/Product/AHPI7292S/20_Getting_Started_New
Note
The key part is the one-liner setup step: Step 4. Setup the software with an one-liner command
After the setup process is done, all required packages and tools will be ready. And then continue the next steps below:
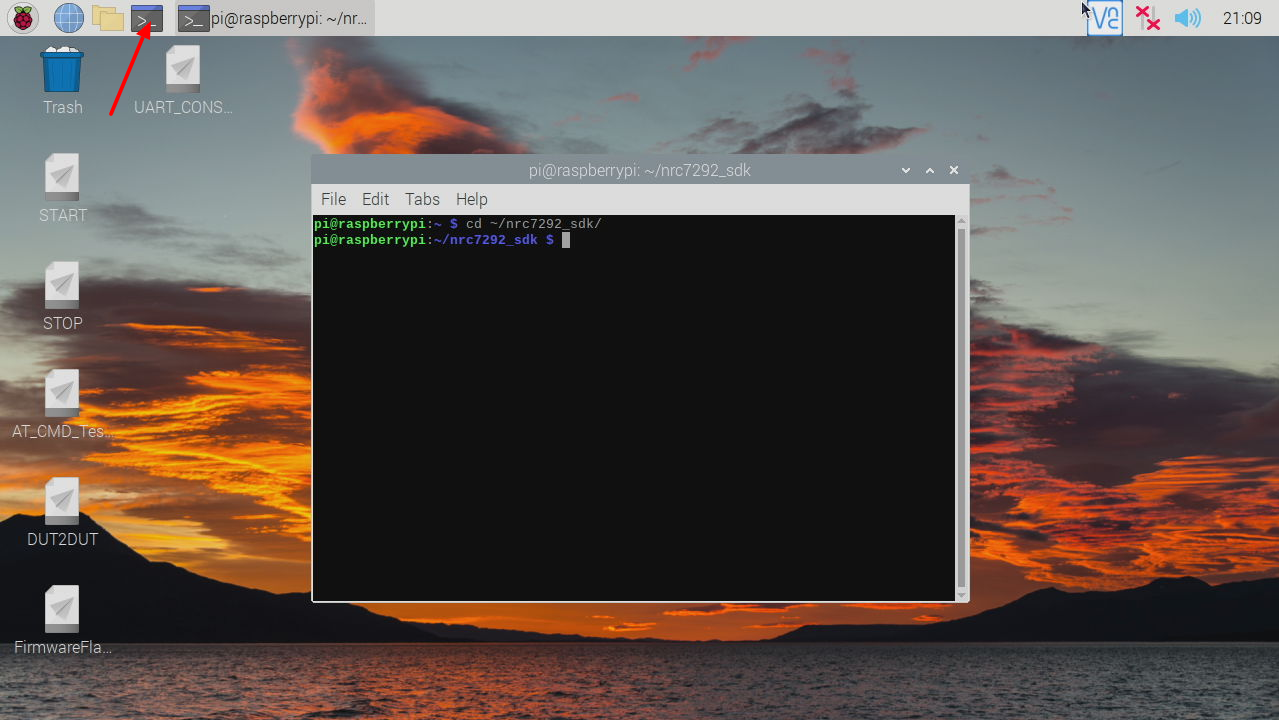
Open a Terminal, and then enter the ~/nrc7292_sdk/ directory
cd ~/nrc7292_sdk/
There are sample apps listed in the package/standalone/sdk/apps/ directory. Let's pick sample_tcp_client as example.
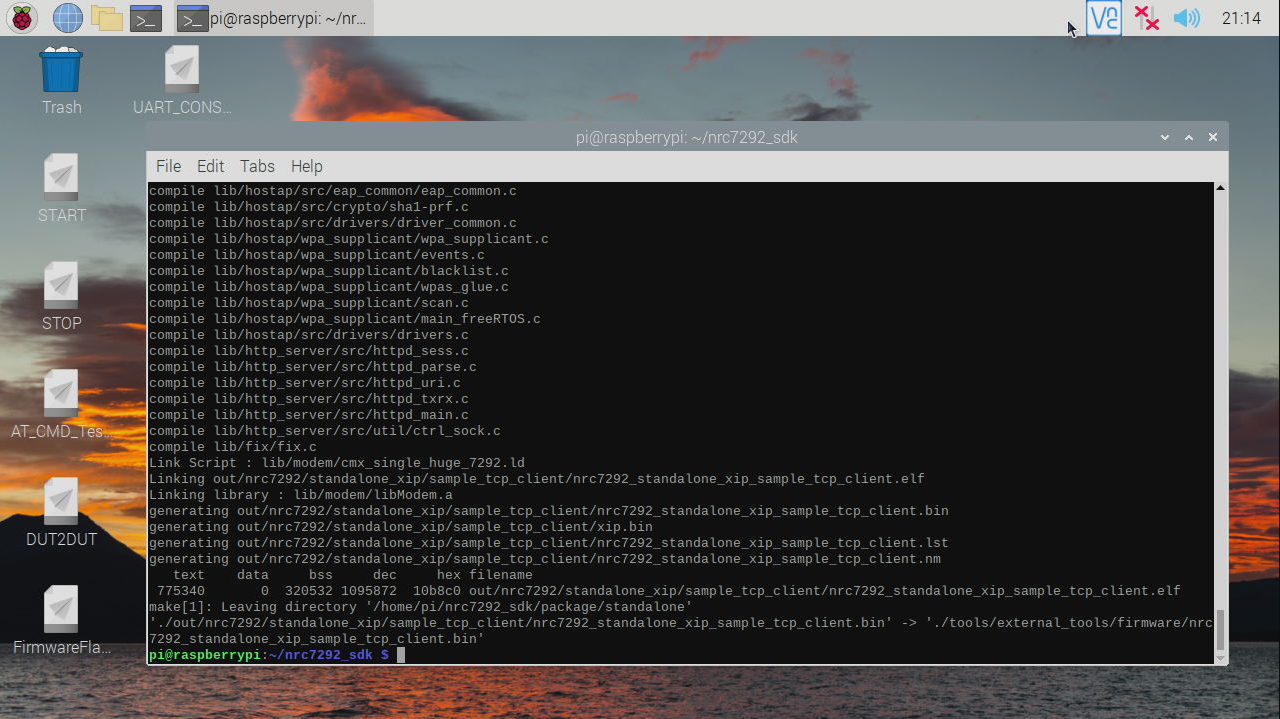
Execute the command below to start compiling image:
./scripts/build_in_native sample_tcp_client
Note
You can replace the sample_tcp_client with your own app name.
After compilation is done, the result images will appear in the following path:
package/standalone/out/nrc7292/standalone_xip/sample_tcp_client/
The build script will also copy it to the directory which is in the FirmwareFlashTool's search path:
package/standalone/tools/external_tools/firmware/
Build STANDALONE mode image in general Linux
If you have a general Linux system with docker and git installed, you can setup the development environment easily as below.
Requirements:
- Linux system
- If you don't have a Linux machine, you can create a new Linux system in a virtual machine like VirtualBox or VMWare.
- If you don't know which Linux distro to pickup, you can try a latest Ubuntu Linux(22.04) as default Linux system.
- docker
- The official site has setup guide: URL HERE.
- git
- It's commly available in every Linux system. You can easily find and install it.
At first, get the nrc7292_sdk source code:
git clone https://github.com/newracom/nrc7292_sdk.git
cd nrc7292_sdk
Note
It's possible to encounter breaking changes in the future. You can checkout the specific revision via:
git checkout d0ba3f1
Apply patches then:
git apply <(curl -sL https://downloads.alfa.com.tw/raspbian/nrc7292_sdk.patch.txt)
After necessary setup above done, the files listed below will be available:
scripts/build_in_dockerpackage/standalone/lib/fix
Note
You can see more details by command: git status and git diff
There are apps in the package/standalone/sdk/apps/ directory. Let's pick sample_tcp_client as example.
Execute the command below to start compiling image:
./scripts/build_in_docker sample_tcp_client
Note
You can replace the sample_tcp_client with your own app name.
After compilation is done, the result images will appear in the following path:
package/standalone/out/nrc7292/standalone_xip/sample_tcp_client/
The build script will also copy it to the directory which is in the FirmwareFlashTool's search path:
package/standalone/tools/external_tools/firmware/
Reflash the device with a STANDALONE mode image
NEWRACOM provides a tool FirmwareFlashTool to reflash the STANDALONE mode image into NRC7292 based devices. The FirmwareFlashTool can run on Windows, Linux system, and also Raspberry Pi.
For Windows users, please reference the official document below(In page 18, "How to download compiled binaries"):
We won't repeat it here. Instead, we introduce another way to do it based on Raspberry Pi.
At first, please follow the document of AHPI7292S to setup a Raspberry Pi device:
https://docs.alfa.com.tw/Product/AHPI7292S/20_Getting_Started_New
Note
The key part is the one-liner setup step: Step 4. Setup the software with an one-liner command
After the setup process is done, all required packages and tools will be ready. Then, please conntinue the sections below:
For AHPI7292S
At first, install the AHPI7292S onto the Raspberry Pi before power on. And then, turn the mode switch to the "DOWNLOAD MODE" position.
Note
More details about how to switch modes: How to switch modes
After the hardware installation and wiring is done, power on the device.
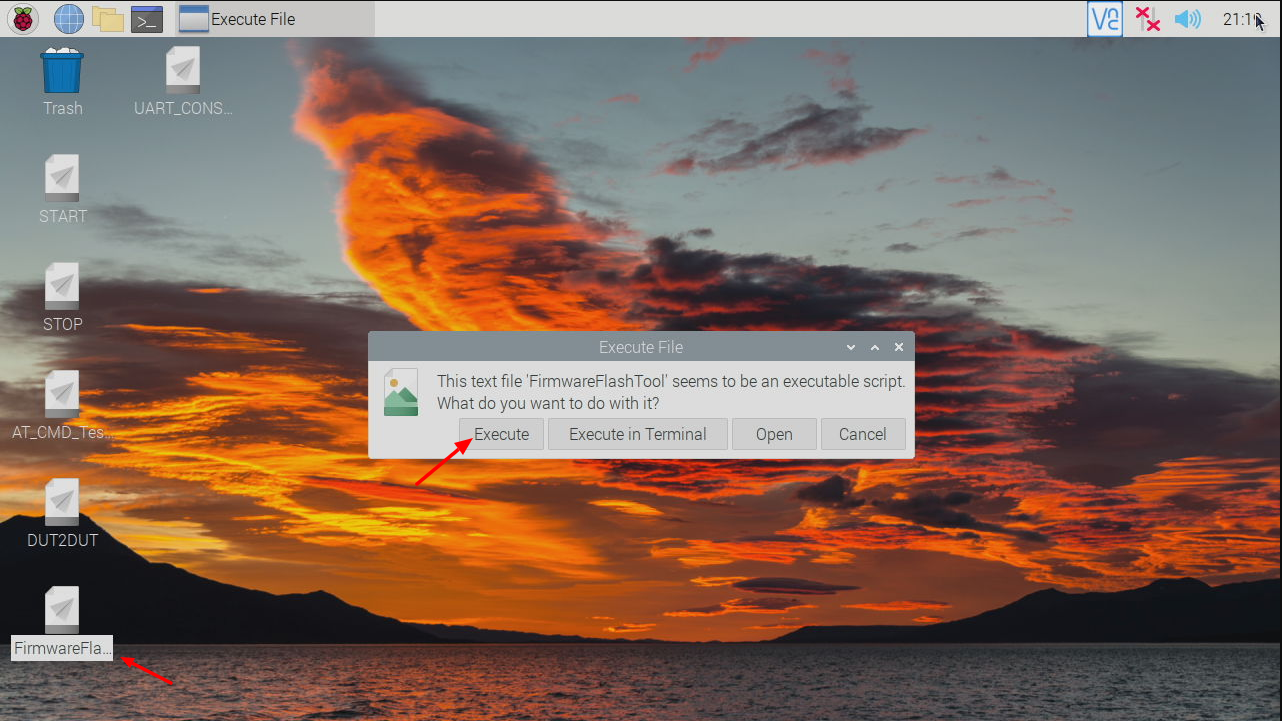
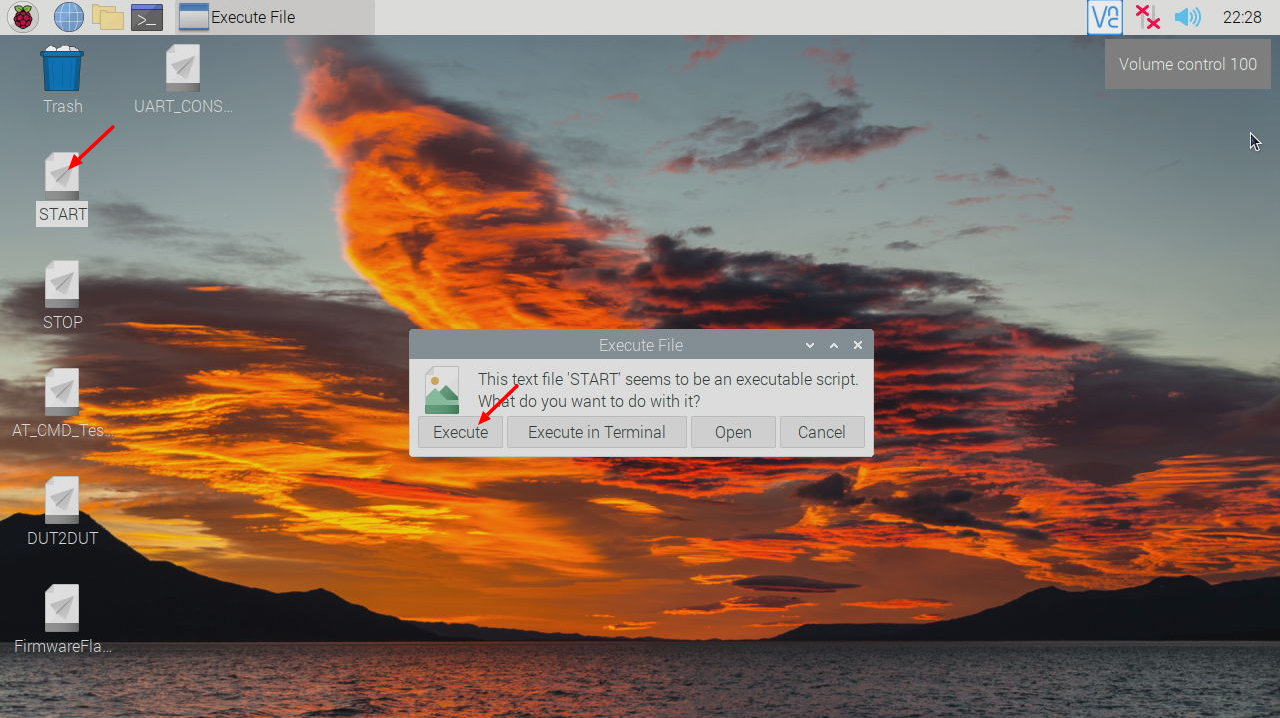
When Raspberry Pi enters the desktop environment, click the desktop shortcut of "FirmwareFlashTool".(Click the "Execute" button when the dialog of "Execute File" prompts.)
In the part of "SERIAL PORT", press "Refresh" button and then select the "ttyAMA0" item

In the part of "XIP Firmware Path (.bin)", press the "SET" button on the right.

Enter the "firmware" directory and select the firmware file for reflashing. (ex: "nrc7292_standalone_xip_sample_tcp_client.bin")

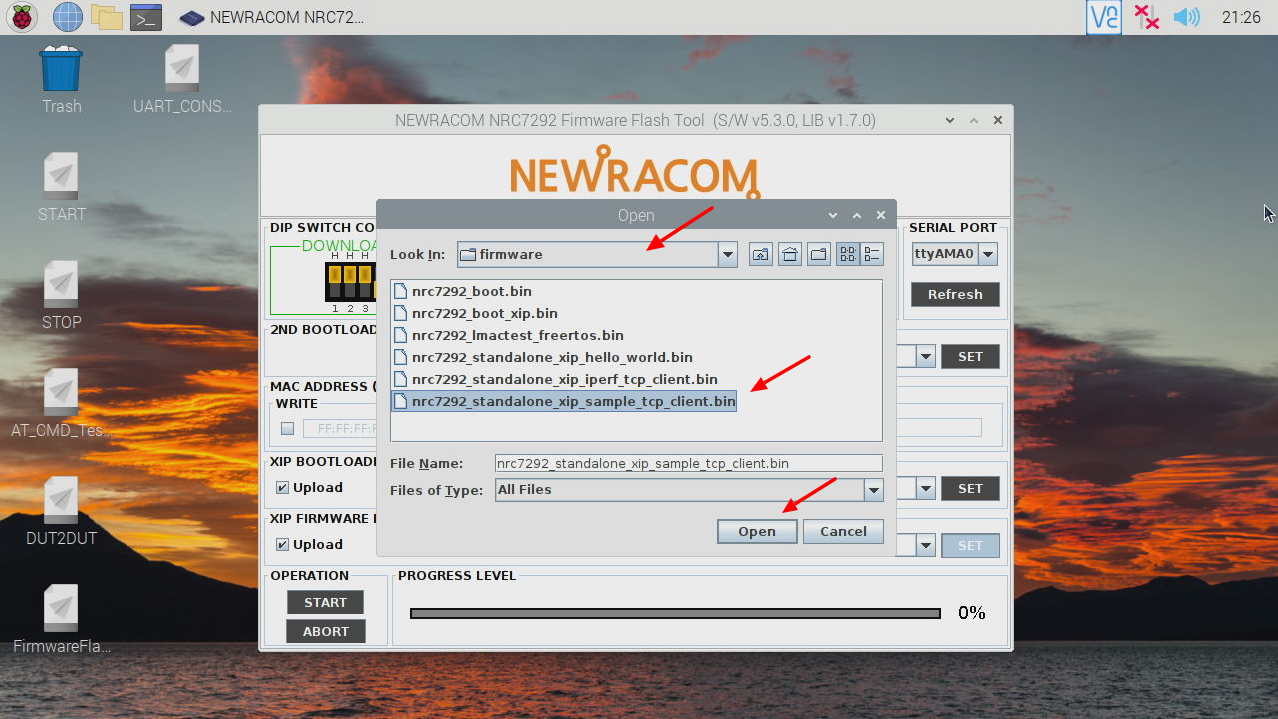
Press the "START" button in the part of "OPERATION"
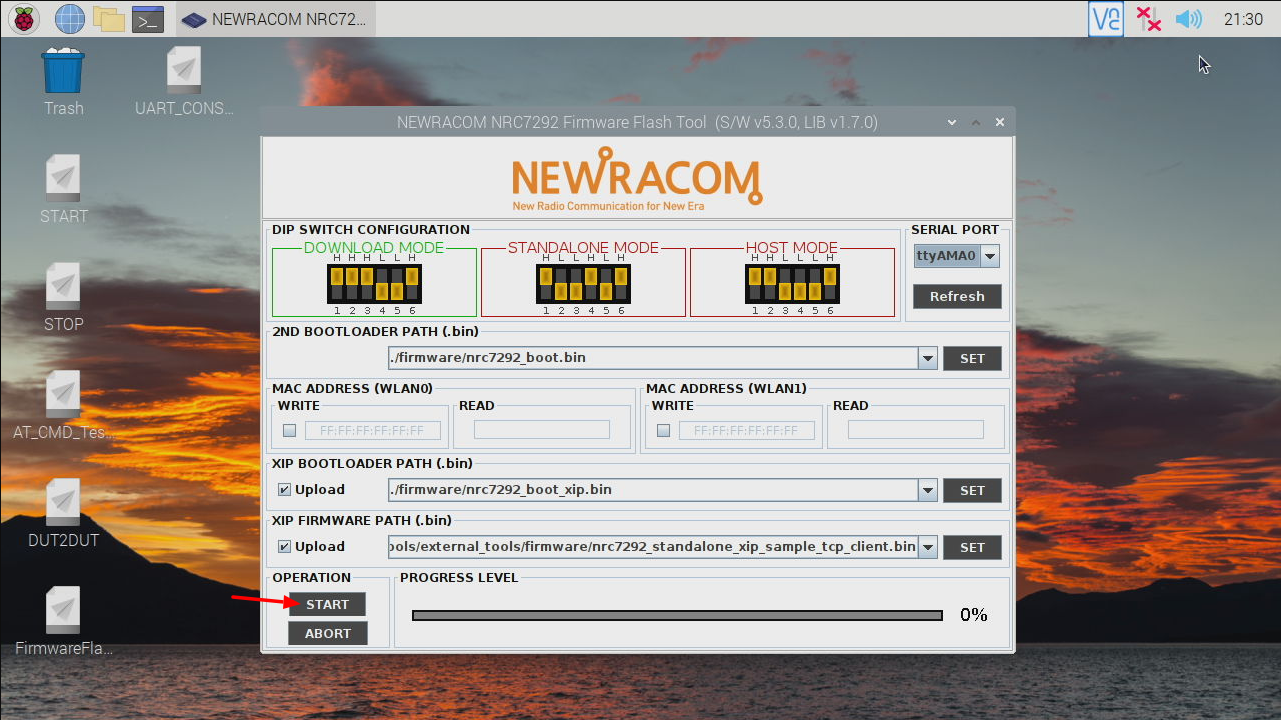
When the "PROGRESS LEVEL" part shows "100%" and "Complete" messages, the whole reflash process is done.

Warning
Be sure to close all UART console application before launch FirmwareFlashTool.
Because it will occupy the /dev/ttyAMA0 serial port and block the reflash procedures.
For AHMB7292S
At first, connect the AHMB7292S with the Raspberry Pi before power on. The wiring is as below:
| Raspberry Pi | AHMB7292S | Comments |
|---|---|---|
| pin 8, GPIO 14(TXD) | RX3 | UART |
| pin 10, GPIO 15(RXD) | TX3 | UART |
| Ground | GND | Ground |
| 3V3 power | 3.3V | Power |
and
| AHMB7292S | AHMB7292S | Comments |
|---|---|---|
| M1 | 3.3V | short circuit for switching to DOWNLOAD MODE |
Note
For the Raspberry Pi's pinout, please reference the official document: GPIO and the 40-pin Header
Note
For AHMB7292S's pinout, please reference the official document: Pinout
Note
More details about how to switch modes: How to switch modes
After the hardware installation and wiring is done, power on the device.
When Raspberry Pi enters the desktop environment, click the desktop shortcut of "FirmwareFlashTool".(Click the "Execute" button when the dialog of "Execute File" prompts.)
In the part of "SERIAL PORT", press "Refresh" button and then select the "ttyAMA0" item
In the part of "XIP Firmware Path (.bin)", press the "SET" button on the right.
Enter the "firmware" directory and select the firmware file for reflashing. (ex: "nrc7292_standalone_xip_sample_tcp_client.bin")
Press the "START" button in the part of "OPERATION"
When the "PROGRESS LEVEL" part shows "100%" and "Complete" messages, the whole reflash process is done.
Warning
Be sure to close all UART console application before launch FirmwareFlashTool.
Because it will occupy the /dev/ttyAMA0 serial port and block the reflash procedures.
Launch the device with STANDALONE mode
The requirements to run the device into STANDALONE mode are:
- The device is reflashed with a bootable STANDALONE mode image
- The mode switch is configured to STANDALONE mode
- Supply with 3.3V power
For AHPI7292S
Assume the AHPI7292S has been installed to the Raspberry Pi and was reflashed with proper STANDALONE mode image.
Then turn the mode switch to the "STANDALONE MODE" position.
Note
More details about how to switch modes: How to switch modes
Power on the device, and then the AHPI7292S will start running in STANDALONE MODE.
Note
The "RESET" button of AHPI7292S can trigger to reboot the AHPI7292S itself without restarting the whole Raspberry Pi.
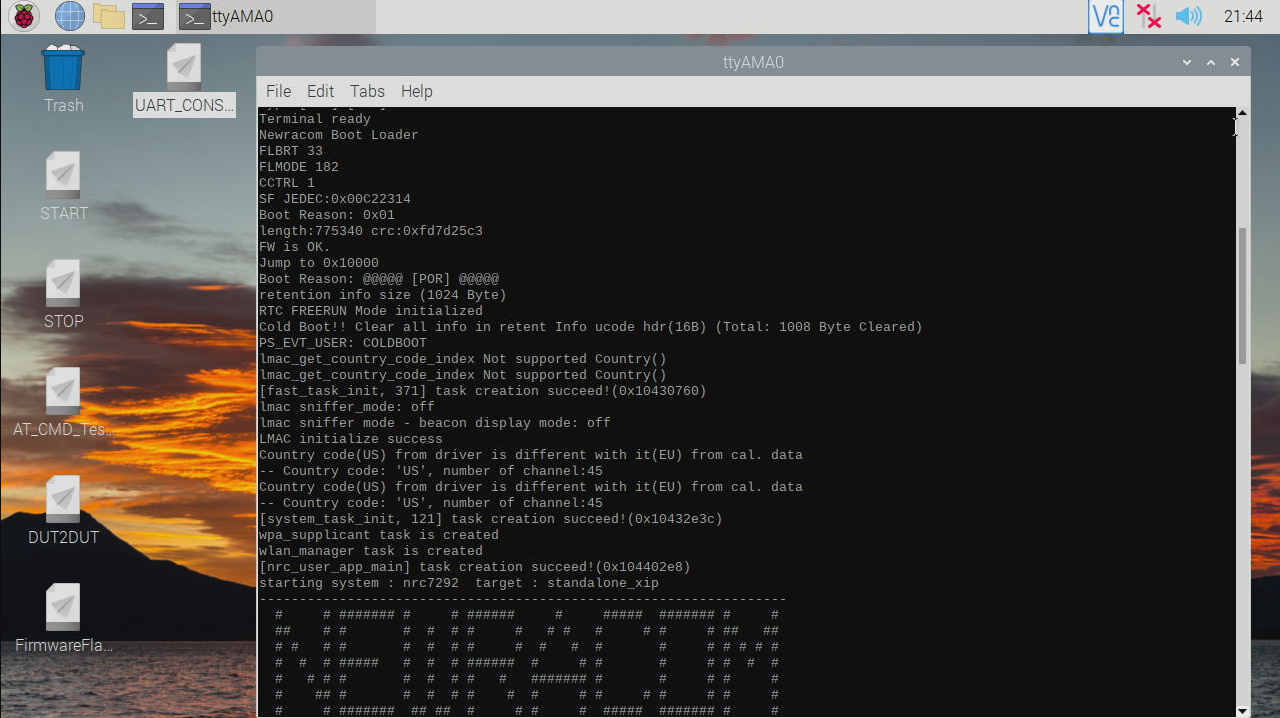
To interact with the device's UART, you can click the desktop shortcut of "UART_CONSOLE". (Click the "Execute" button when the dialog of "Execute File" prompts.)
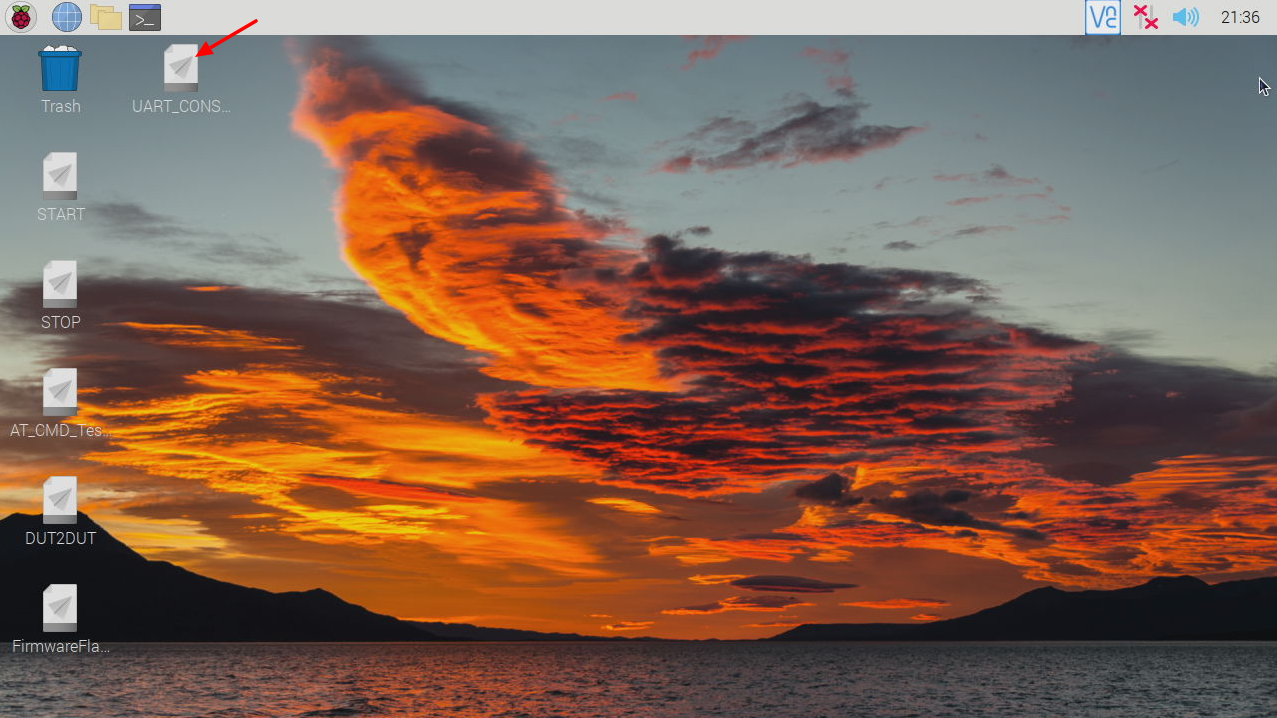
and press the AHPI7292S's "RESET" button once. The you can see the device reboot and display startup messages.
For AHMB7292S
At first, connect the AHMB7292S with the Raspberry Pi before power on. The wiring is as below:
| Raspberry Pi | AHMB7292S | Comments |
|---|---|---|
| pin 7, GPIO 4(GPCLK0) | RST | Reset |
| pin 24, GPIO 8(CE0) | CS | |
| pin 23, GPIO 11(SCLK) | SCK | |
| pin 21 GPIO 9(MISO) | SDO | |
| pin 19 GPIO 10(MOSI) | SDI | |
| pin 29, GPIO 5 | INT | |
| pin 10, GPIO 15(RXD) | TX2 | UART |
| pin 8, GPIO 14(TXD) | RX2 | UART |
| pin 5, GPIO 3(SCL) | SCL | |
| pin 3, GPIO 2(SDA) | SDA | |
| 3V3 | 3.3V | |
| Ground | GND | Ground |
Note
You can use the product to save the wiring work: https://www.alfa.com.tw/products/apimb
and
| AHMB7292S | AHMB7292S | Comments |
|---|---|---|
| M0 | GND | short circuit for switching to STANDALONE MODE |
| M2 | 3.3V | short circuit for switching to STANDALONE MODE |
Power on the device, and then the device will start running in STANDALONE MODE.
To interact with the device's UART, you can click the desktop shortcut of "UART_CONSOLE". (Click the "Execute" button when the dialog of "Execute File" prompts.)
and reset the device's 3.3V power once. The you can see the device reboot and display startup messages.
A sample test case
We setup a specific sample test case as below:
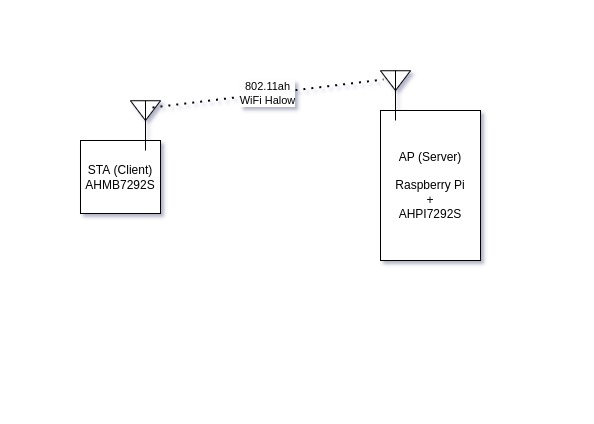
- AP side (server)
- Raspberry Pi + AHPI7292S
- Use HOST mode
- Use
nc(netcat) to run as a TCP data receiver daemon
- STA side (client)
- AHMB7292S
- Use STANDALONE mode
- Use sample_tcp_client STANDALONE mode image as a TCP data sender
- We select country code of "EU" instead of the default "US", to show where need to be modified.
AP side (server)
Setup the Raspberry Pi and AHPI7292S as the AHPI7292S's document describes:
https://docs.alfa.com.tw/Product/AHPI7292S/20_Getting_Started_New
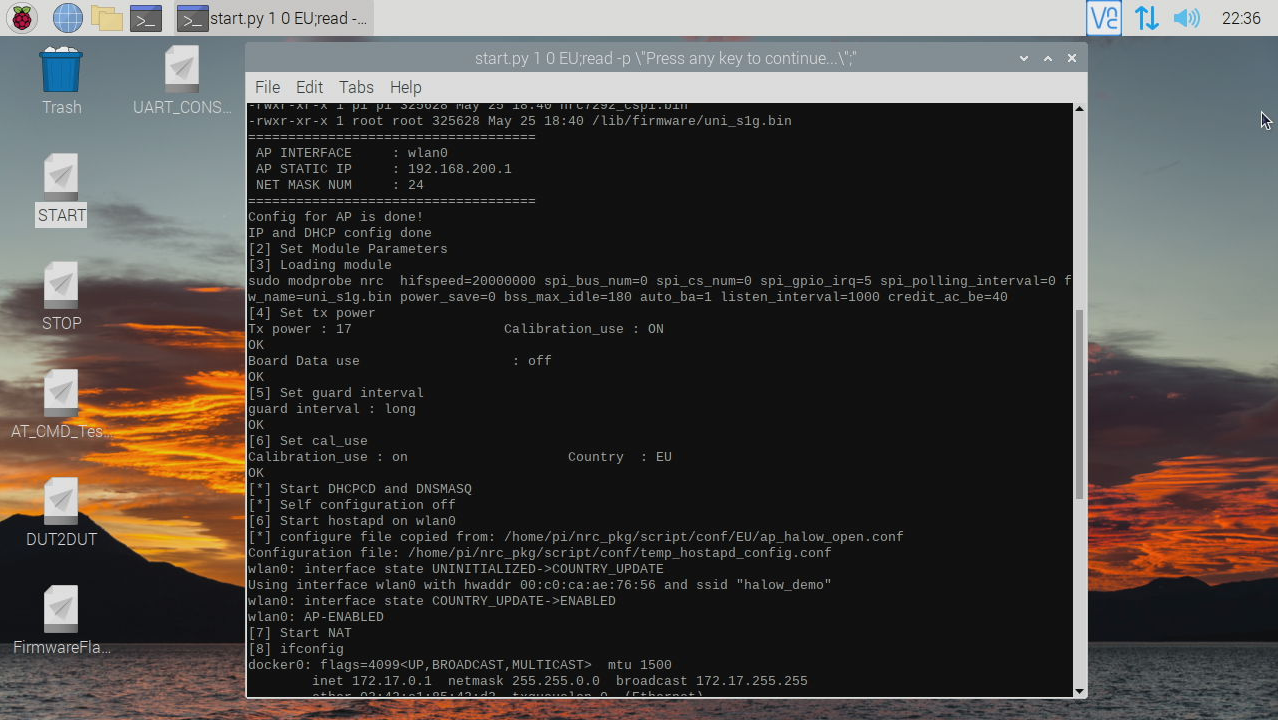
When Raspberry Pi enters the desktop environment, click the desktop shortcut of "START".(Click the "Execute" button when the dialog of "Execute File" prompts.)
Choose the "AP" in the "Role" dialog:

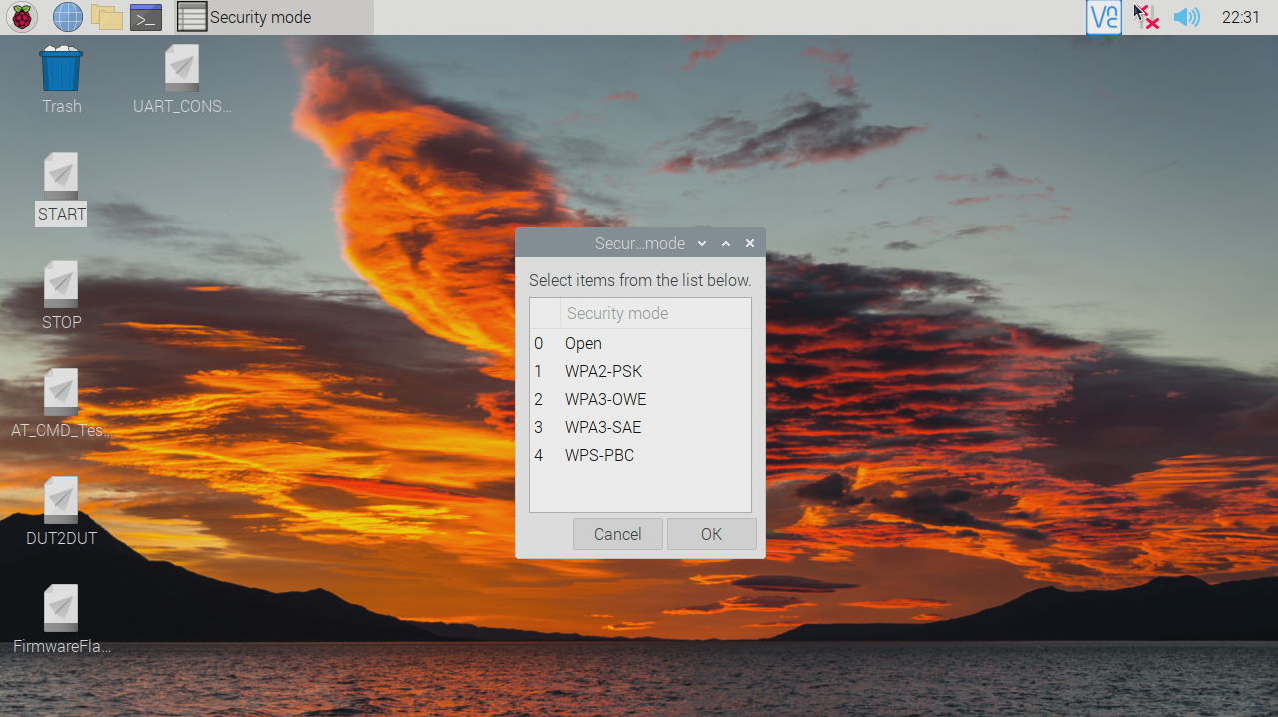
Choose the "Open" in the "Security mode" dialog:
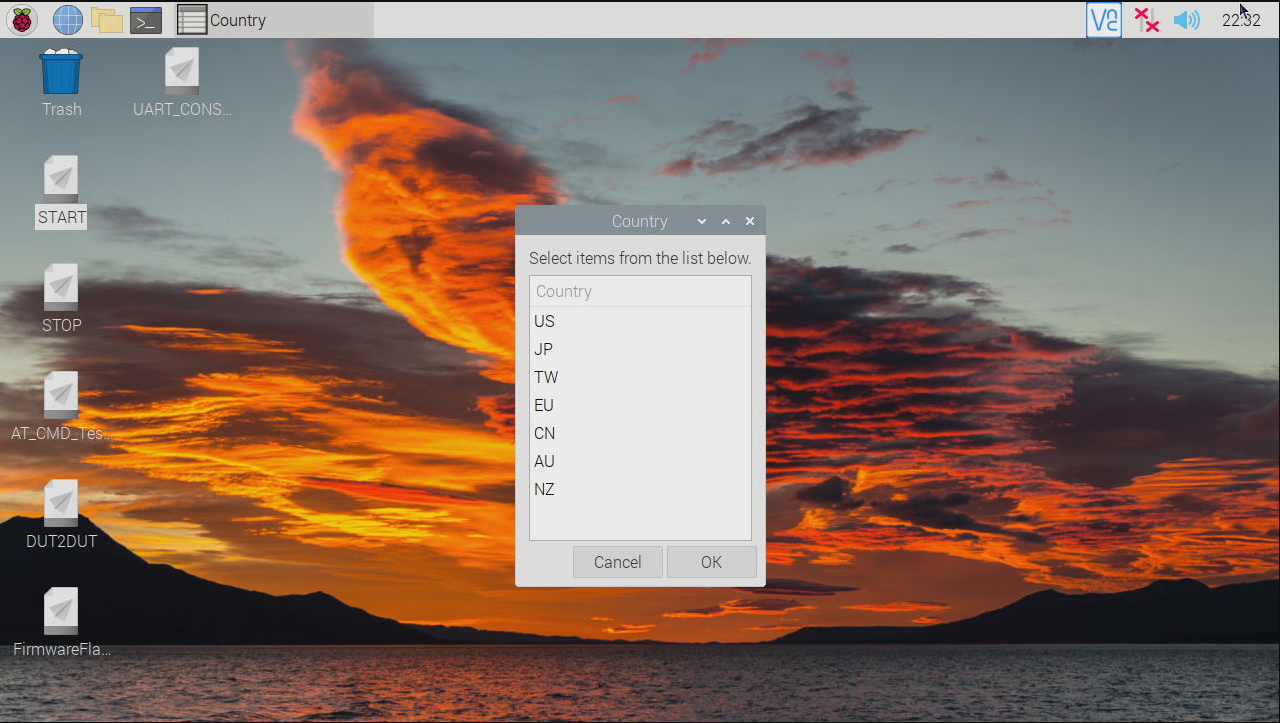
Choose the "EU" in the "Country" dialog:
Press "OK" in the "Preview command" info dialog:
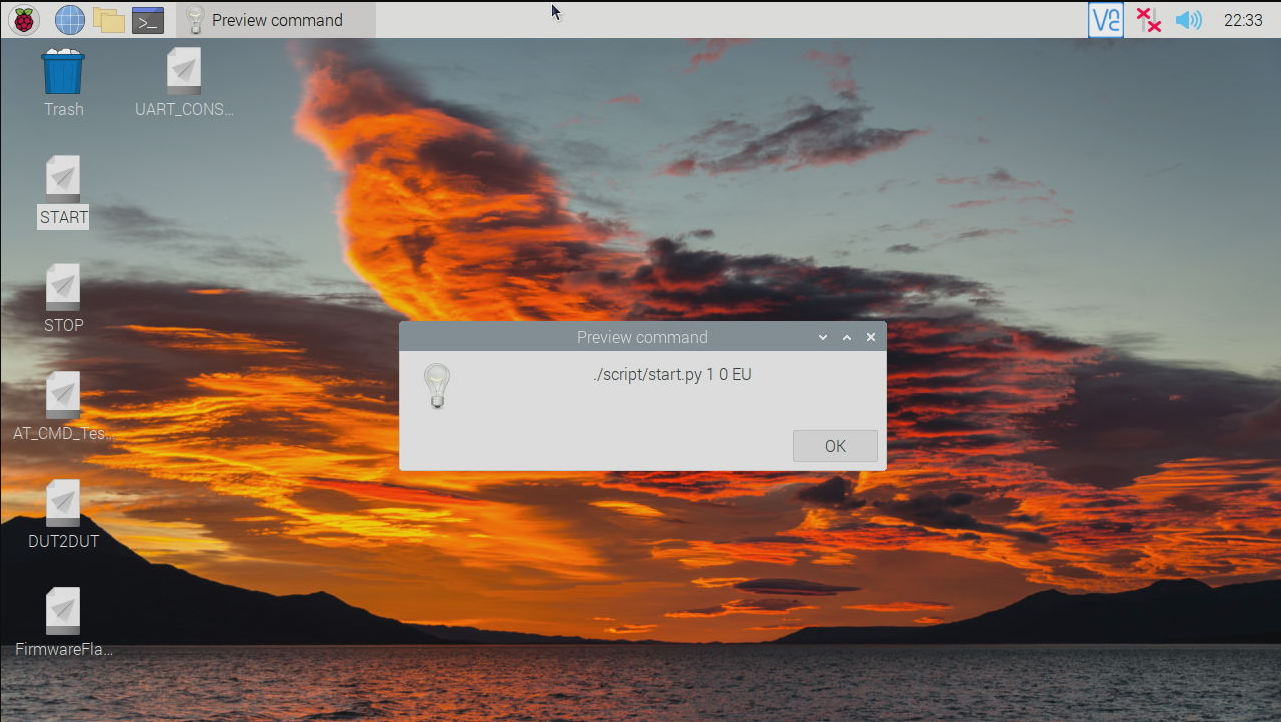
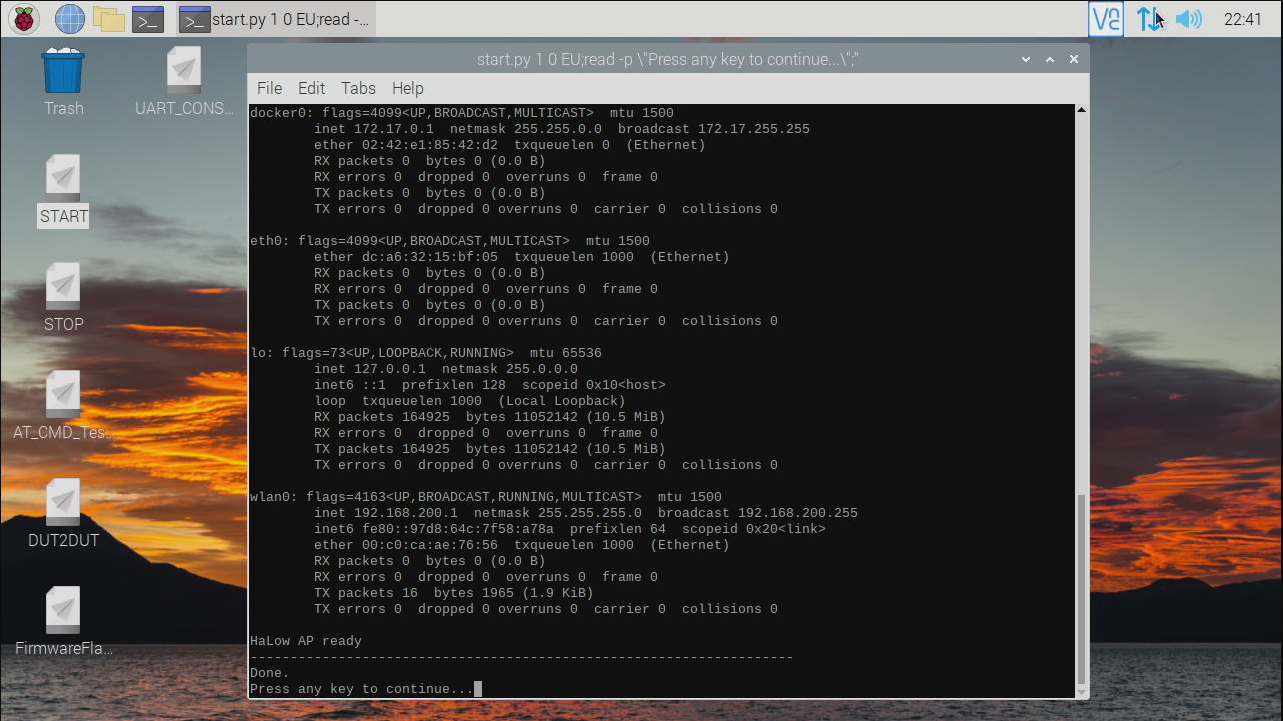
The terminal will display the launch console logs and AP will be running in the background. You can press any key to close the terminal, or keep it to see incoming system messages.
Open a new Terminal, and then execute the command below:
nc -l 8099
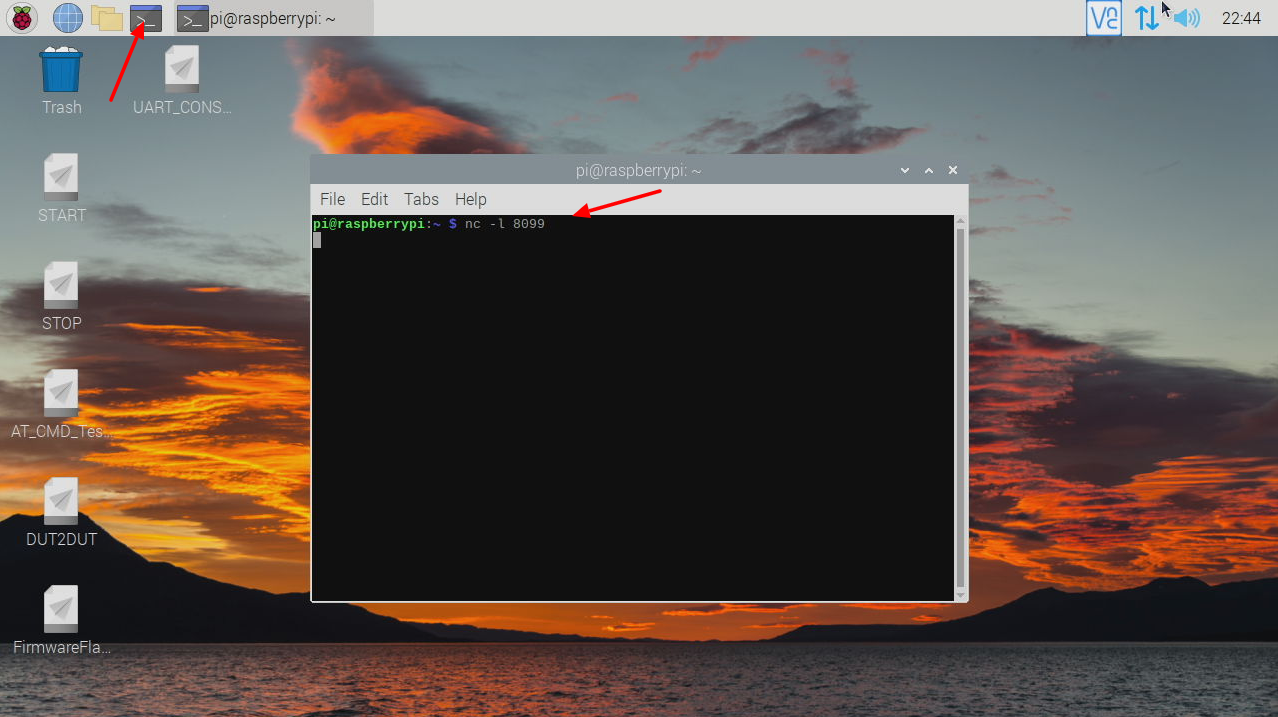
Now the AP side (server) is complete
STA side (client)
The process: Rebuild image => Reflash device => Launch STANDALONE mode
Rebuild
Enter the nrc7292_sdk/ source directory, and edit the file of package/standalone/sdk/apps/wifi_common/wifi_config.h for EU country as below:
diff --git a/package/standalone/sdk/apps/wifi_common/wifi_config.h b/package/standalone/sdk/apps/wifi_common/wifi_config.h
index 0faf96b..77bc464 100755
--- a/package/standalone/sdk/apps/wifi_common/wifi_config.h
+++ b/package/standalone/sdk/apps/wifi_common/wifi_config.h
@@ -33,7 +33,7 @@

 /* KR:Korea, JP: Japan, US:United States, TW: Taiwan, EU: EURO */
 #ifndef COUNTRY_CODE
-#define COUNTRY_CODE "US"
+#define COUNTRY_CODE "EU"
 #endif /* COUNTRY_CODE */

 /* WIFI_SEC_OPEN, WIFI_SEC_WPA2, WIFI_SEC_WPA3_SAE, WIFI_SEC_WPA3_SAE */
@@ -112,8 +112,8 @@ uint16_t nrc_scan_freq_list[NRC_WIFI_SCAN_FREQ_NUM]={9255,9275,9270};
 #endif /* NRC_WIFI_SCAN_FREQ_NUM */
 #else
 #ifndef NRC_WIFI_SCAN_FREQ_NUM
-#define NRC_WIFI_SCAN_FREQ_NUM 5
-uint16_t nrc_scan_freq_list[NRC_WIFI_SCAN_FREQ_NUM]={9055,9175,9090,9250,9220};
+#define NRC_WIFI_SCAN_FREQ_NUM 7
+uint16_t nrc_scan_freq_list[NRC_WIFI_SCAN_FREQ_NUM]={8645,8645,8655,8665,8675,8640,8660};
 #endif /* NRC_WIFI_SCAN_FREQ_NUM */
 #endif /* !INCLUDE_KR_MIC_CHANNEL */
 #endif /* NRC_WIFI_SCAN_LIST */
@@ -130,7 +130,7 @@ uint16_t nrc_scan_freq_list[NRC_WIFI_SCAN_FREQ_NUM]={9055,9175,9090,9250,9220};

 /* Default CH(MHz) : KR:920.0(KR MIC:927.5) JP:918.0 US:925.0 TW:839.5 EU:864.0 */
 #ifndef NRC_AP_SET_CHANNEL
-#define NRC_AP_SET_CHANNEL 9225
+#define NRC_AP_SET_CHANNEL 8640
 #endif /* NRC_AP_SET_CHANNEL */

 #if defined(INCLUDE_SCAN_MODE)
and then, follow one of the image building guides mentioned above to rebuild the sample_tcp_client image:
Reflash device
After obtaining the built image, please follow the reflashing guide mentioned above to reflash the AHMB7292S device:
Launch STANDALONE mode
After image rebuilding and device reflashing is done, please follow the device launch guide mentioned above to launch the AHMB7292S device:
Test logs and files
We put some related log files and image below, in case you need to compare logs and figure out what's the difference:
- AP side (server) standalone console.log
- STA side (client) standalone console.log
- rebuilt sample_tcp_client image
Known issues
Some official apps tests failed
Per our tests, some apps in official SDK source tree didn't establish connections successfuly. We tried:
sample_tcp_clientandsample_tcp_serveriperf_tcp_clientandiperf_tcp_server
The SDK revision we tested is d0ba3f1 (latest).
Error messages about channel setting failure
The error message repeats while running STANDALONE mode
[system_modem_api_set_channel] Failed to set Channel(0) : Discard
This error message could be from the library package/standalone/lib/modem/libModem.a which is a precompiled library without source code to trace error.
In the STA side (client role), the device still works, but we don't know how it affects in other aspects.