Checking the background noise via DUT2DUT tool
DUT2DUT tool is a diagnose tool provided by Newracom.
With this tool we can check the environment interface factors when the 802.11ah performance is far worse then expected.
Step 1. Flash SD cards for RPi
First, we need to flash a SD card for Raspberry Pi OS system.
For common users, we recommand using Raspberry Pi's official tool, Raspberry Pi Imager, to flash the SD cards.
You can download the software here:
and follow its step-by-step tutorial youtube video to flash SD cards:
How to use Raspberry Pi Imager
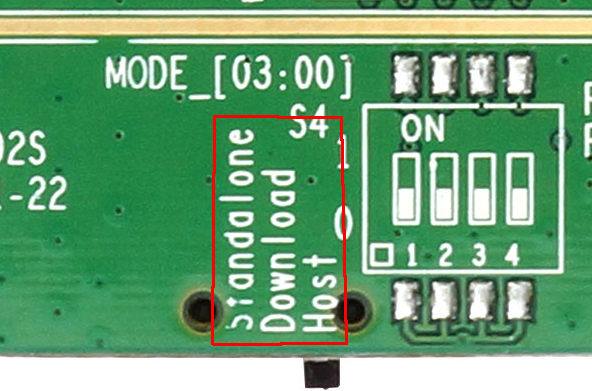
Step 2. Switch to DOWNLOAD mode
Power off Raspberry Pi.
Insert Raspberry Pi SD card and then slide the switch of AHPI7292S to the "Download" position:
Step 3. Get the DUT2DUT tool software
Cet the DUT2DUT tool , the filename is like below:
DUT2DUT(v#_#_#)+DM(v#_#_#)+FLASH_TOOL(v#_#_#).zip
Note
The DUT2DUT tool is provided by Newracom, please contact Newracom's support to get the diagnose tool.
Extract the file to the ~/Desktop directory and rename the directory name to DUT2DUT.
Note
The special characters of directory name may cause expected issues.
Step 4. Install dependencies and setup
Run the following CLI commands in Raspberry Pi to install software dependencies:
sudo apt update
sudo apt install -y default-jdk
Create a file ~/Desktop/RUN_DUT2DUT.desktop with content below for desktop shortcut:
[Desktop Entry]
Comment=Run DUT2DUT
Terminal=false
Name=Run DUT2DUT
Exec=bash -c 'raspi-gpio set 13 op dh && java -jar "/home/pi/Desktop/DUT2DUT/DUT2DUT.exe"'
Path=/home/pi/Desktop/DUT2DUT
Type=Application
Icon=
Note
raspi-gpio set 13 op dh is for switch UART port to DOWNLOAD mode.
Step 5. Modify the boot arguments
Edit /boot/config.txt and append a line to it:
dtoverlay=miniuart-bt
Note
By default, the UART of Raspberry Pi will be in use for bluetooth. We need to change boot configuration to release the UART resource.
Edit /boot/cmdline.txt, remove the part below from the boot arguments:
console=serial0,115200
Note
By default, the /dev/ttyAMA0 is used to boot console output. We need to change boot configuration to release the UART resource.
Save and reboot the Raspberry Pi.
Step 6. Launch DUT2DUT
Power on the Raspberry Pi.
Double click the "RUN DUT2DUT", and launch the program.

Select and click the menu item: "Serial >> Upload Firmware"
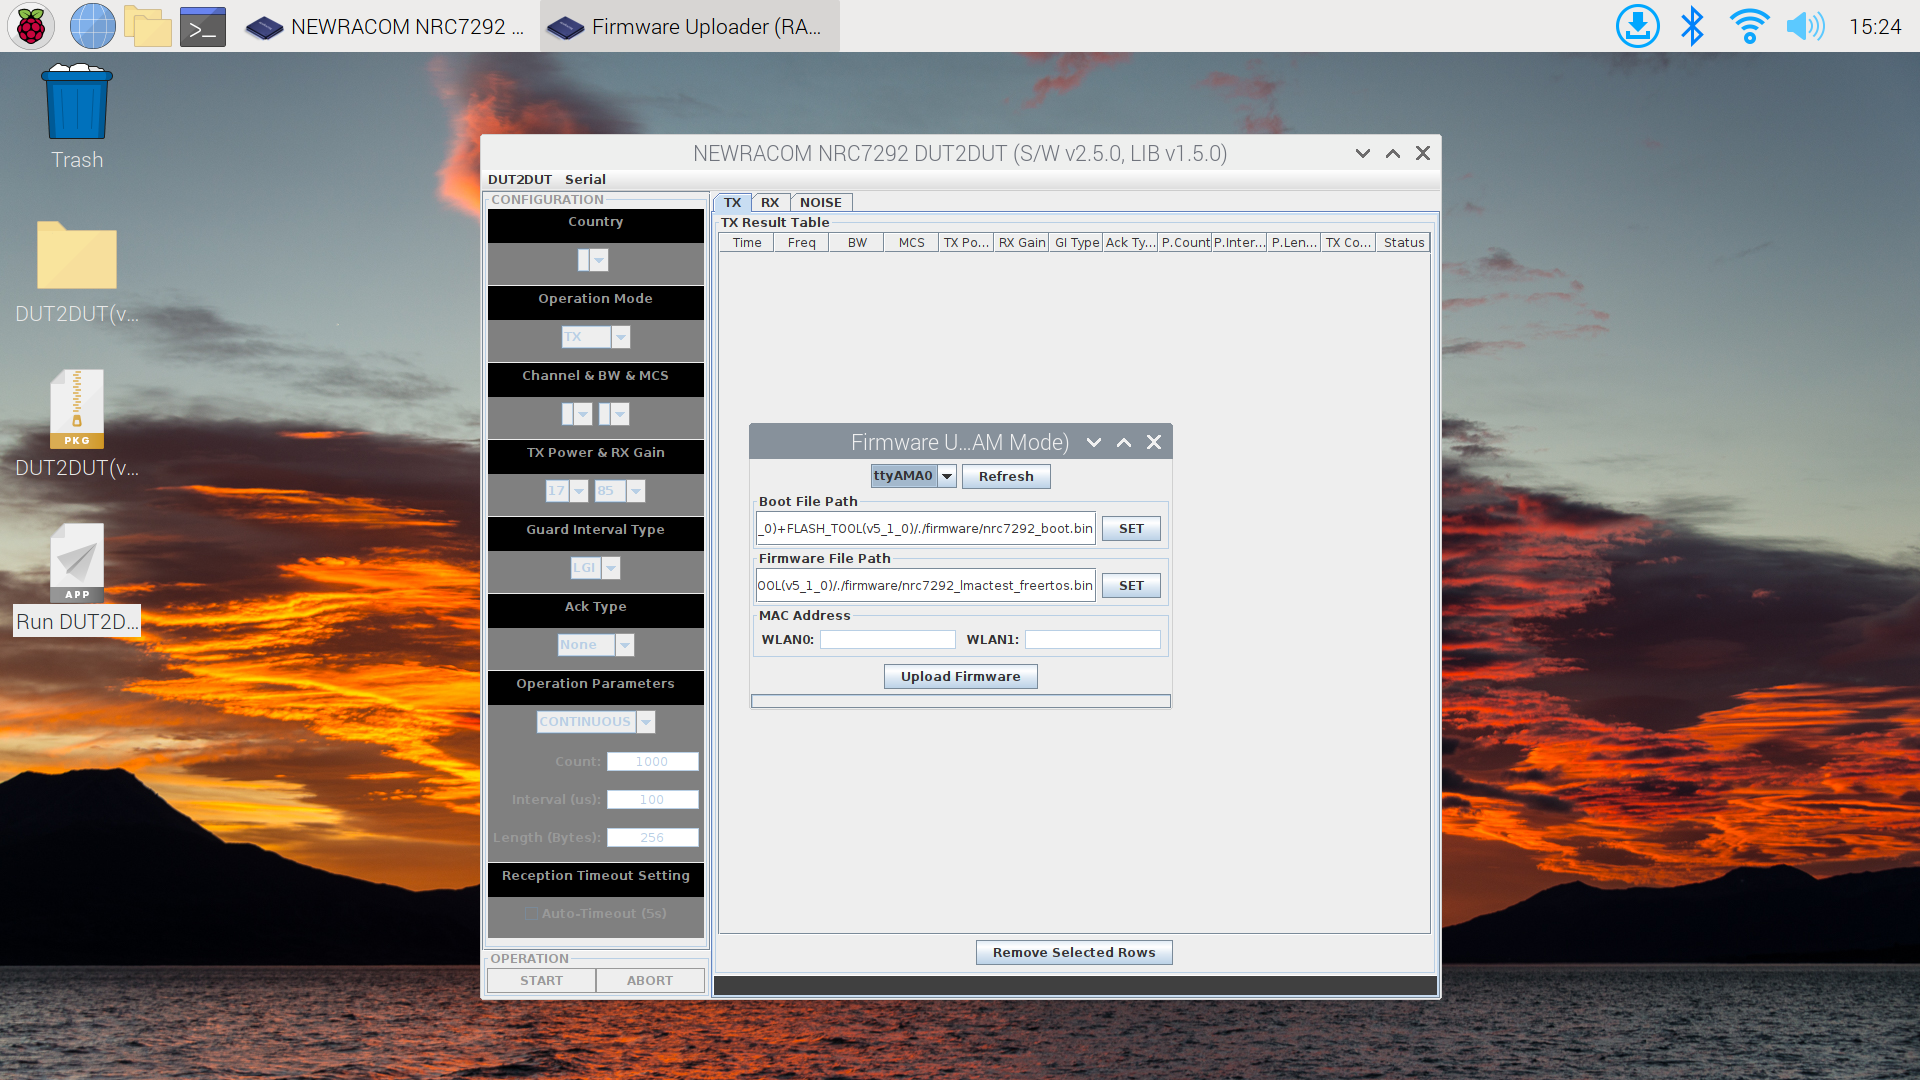
Choose ttyAMA0, and click Upload Firmware
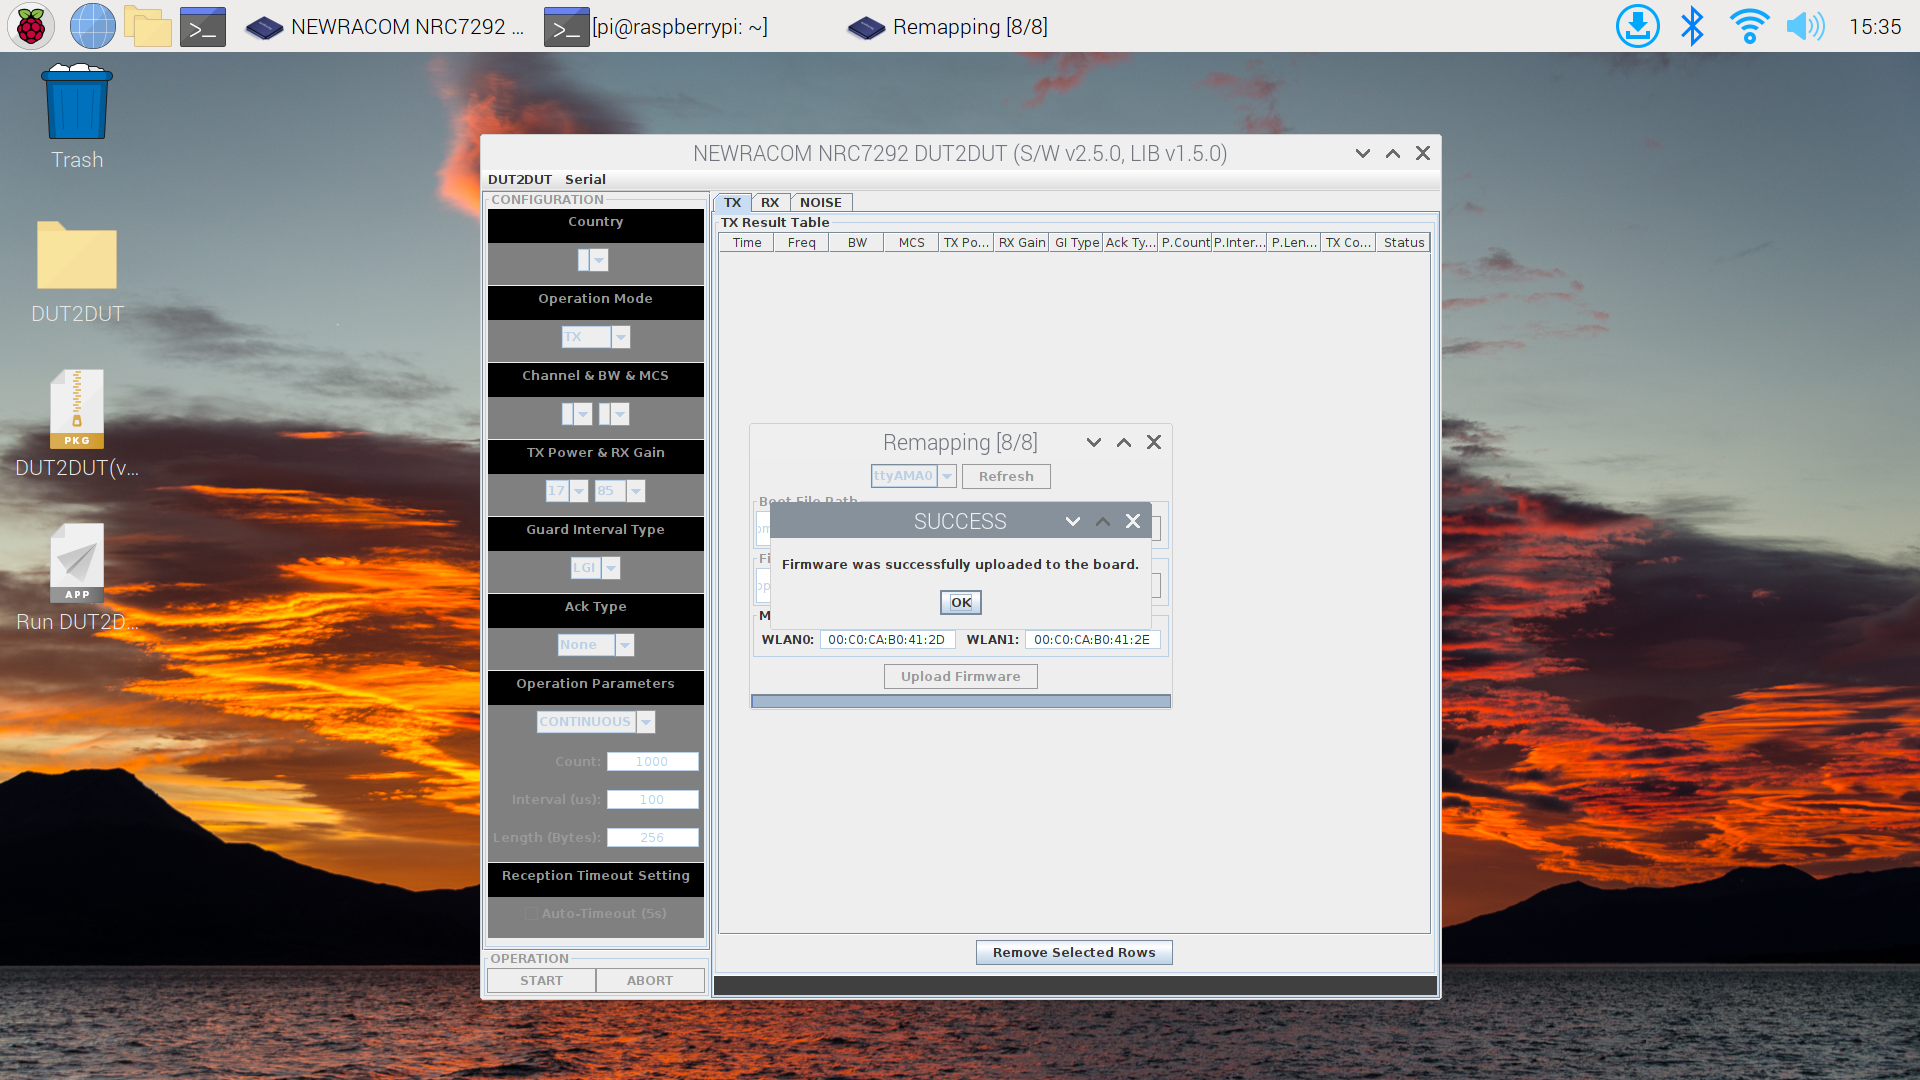
After upload firmware succeeds, close the pop-up dialogs.
And then select and click the menu item: "Serial >> Connect"
Choose "ttyAMA0" and press "OK" button.
The CONFIGURATION values will be refreshed after connected.
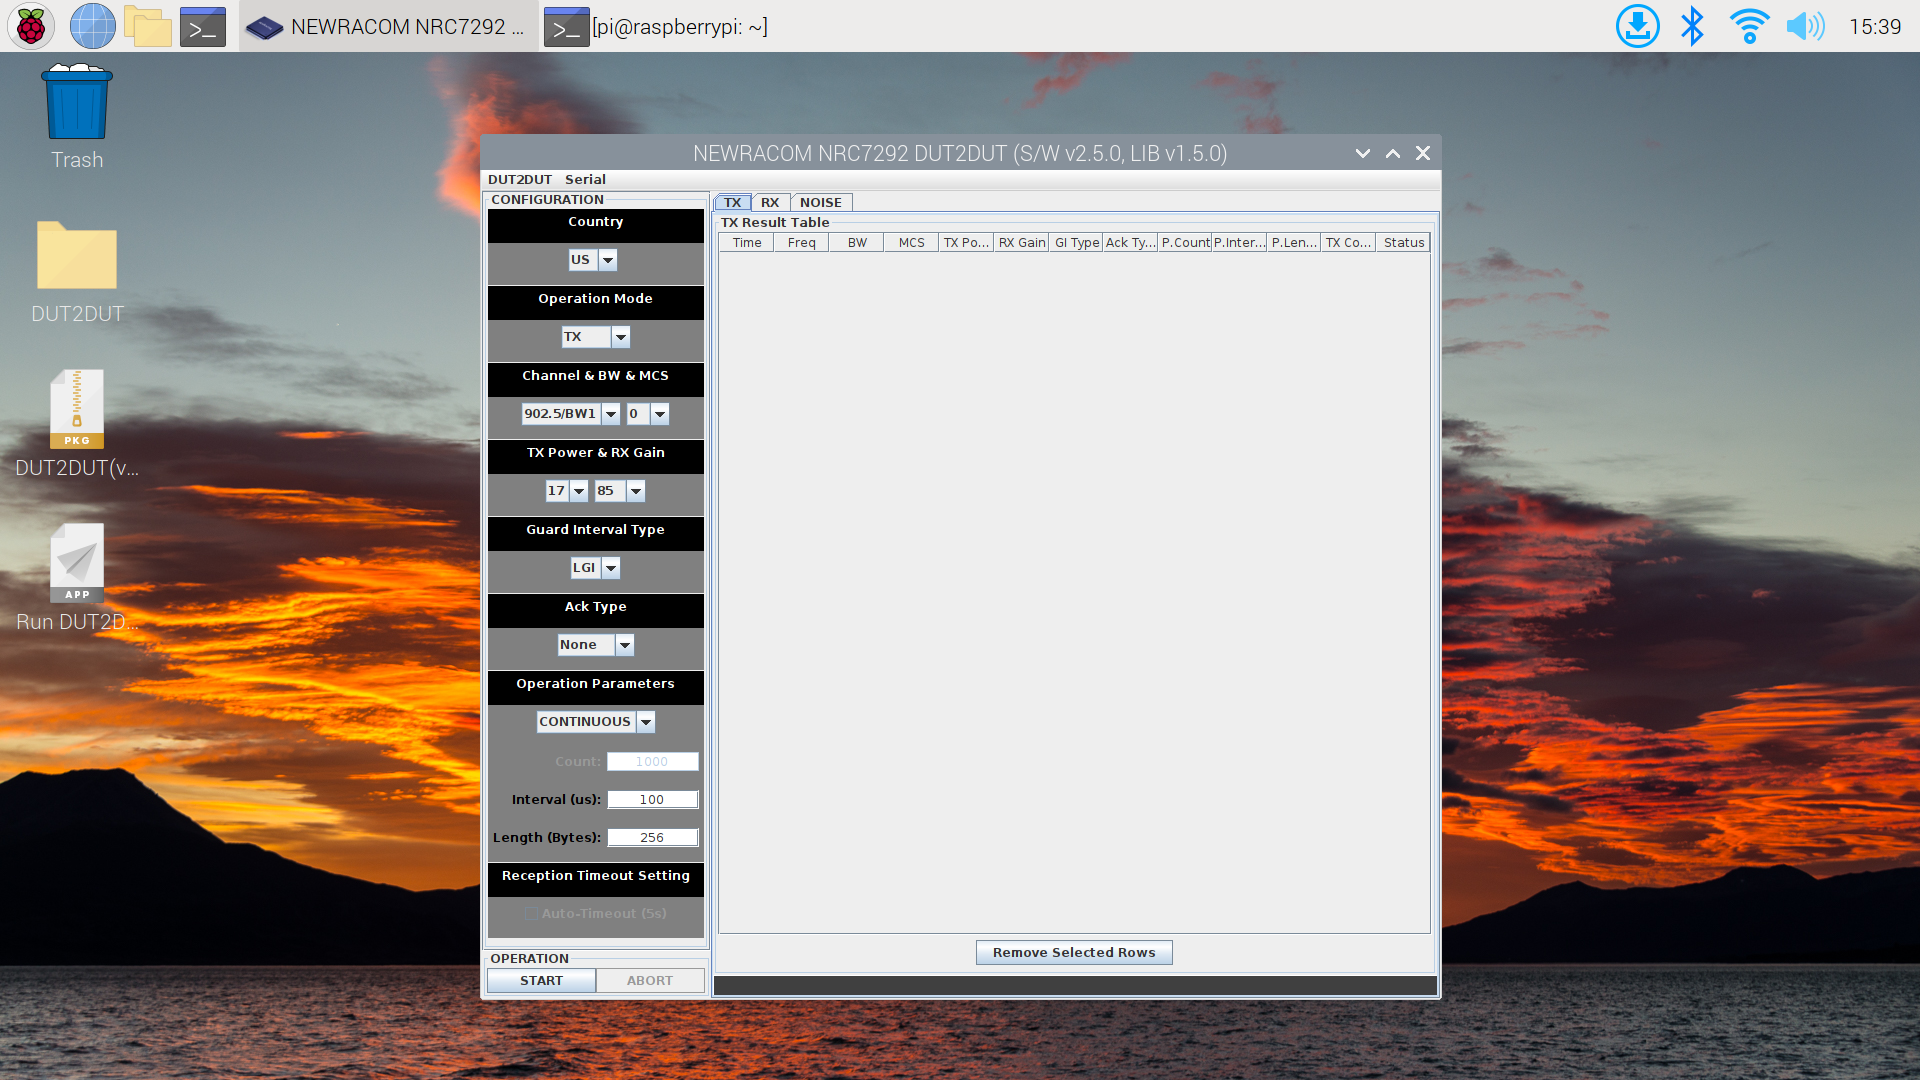
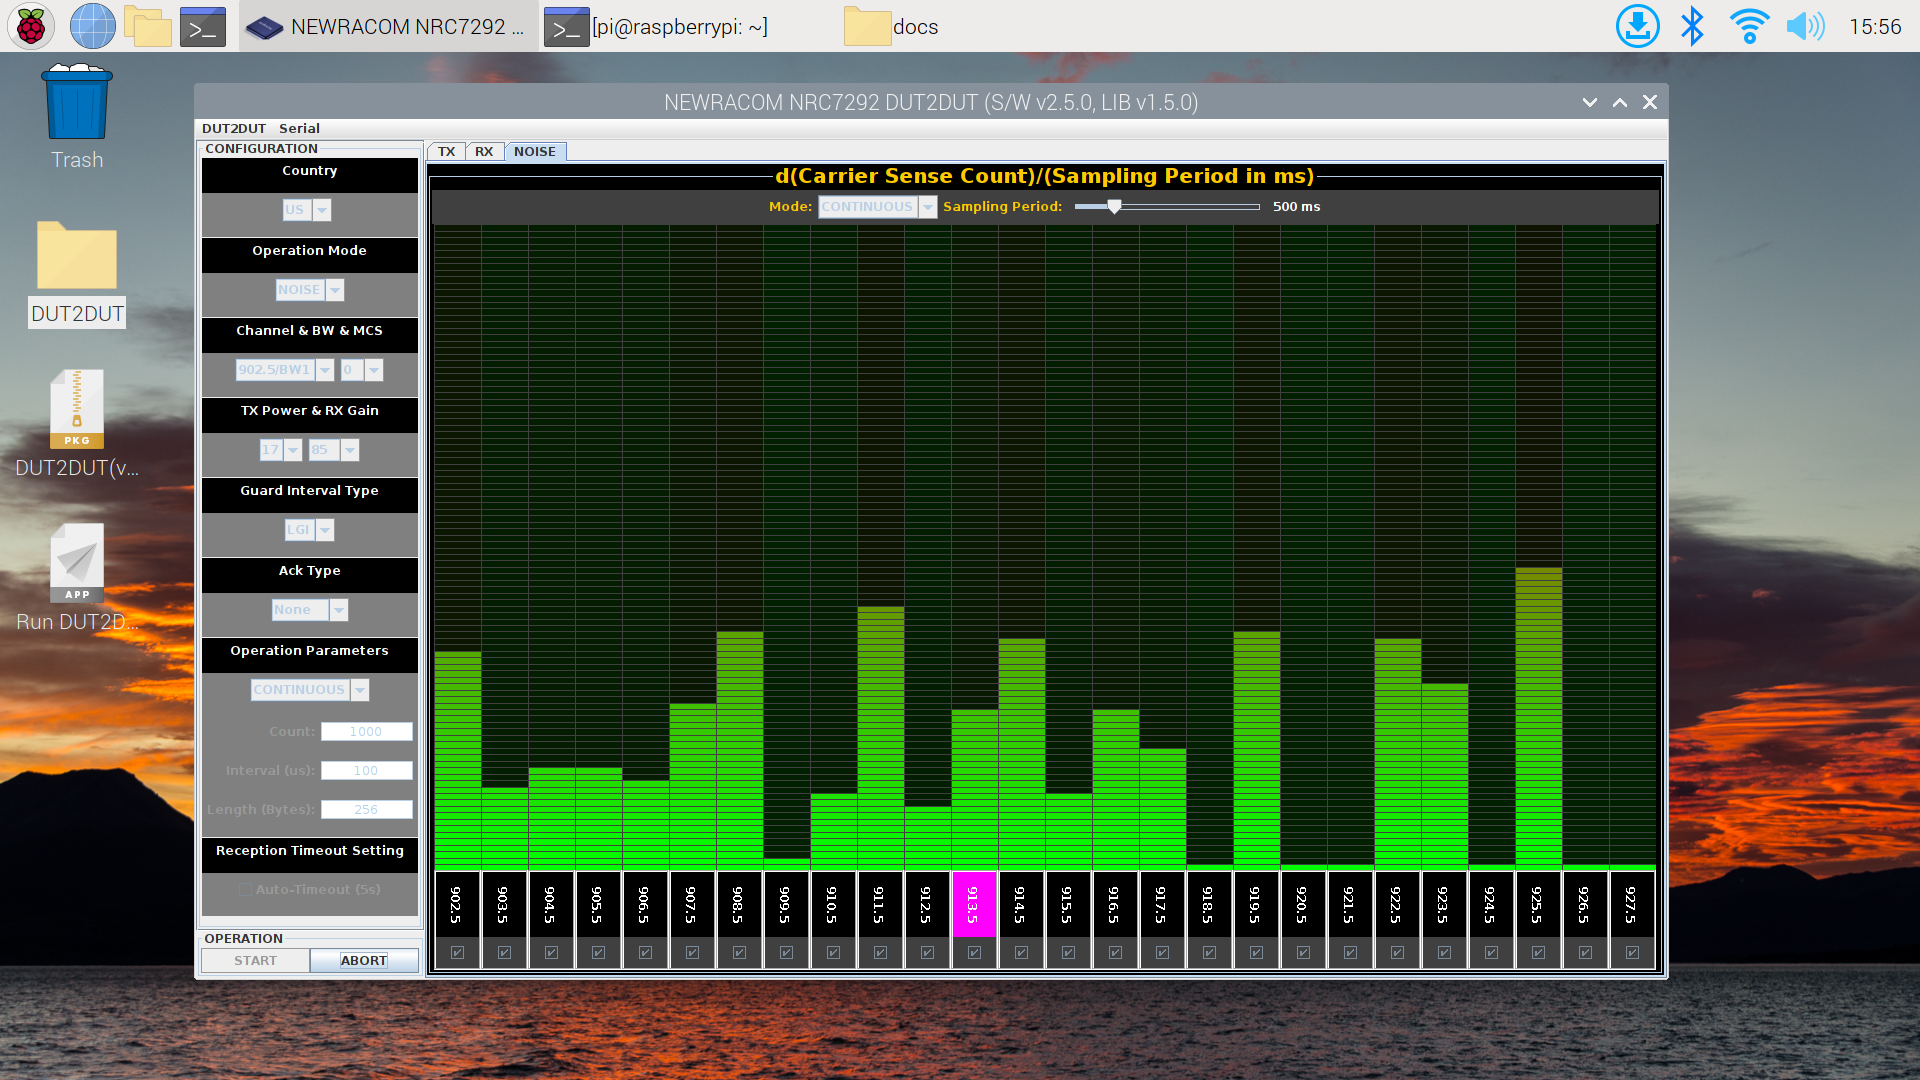
Find the "Operation Mode" option and set it to "NOISE".
Press "START" button, and the program will start scanning.